
Fundamentals

Fly Selection
The advantage of fly tying is that you can match the aquatic foods better in the waters that you fish. Take the time to collect and sample the aquatic foods and take them home to the tying bench. Next, look through the 100 plus patterns listed in this book and make the closest match.
Customize your flies with the correct color of materials that match your samples. Pay close attention to your fly's size, shape, silhouette, and texture. Make sure that the fly you tie matches these factors with the natural. By doing this the flies you tie will be the best ones for the water that you fish. You’ll catch more and larger fish.
In writing this book I have purposefully omitted the material colors. In the real world aquatic foods take on their own specific coloration for the waters that they inhabit. Since these foods are constantly preyed upon they must match their surroundings to survive. Usually aquatic foods are camouflaged to match the weeds, rocks, and soil that they inhabit. When in doubt select a fly that is the same color of the bottom.
Don’t be afraid to be creative in your tying. This effort in sampling the actual foods that fish are accustomed to eating and matching them will pay off in larger and more fish. This process will make you a better fisherman.
Fish feed upon a great variety of water and land born nourishments. An angler's artificial flies are designed to imitate these foods. Matching your fly to the specific fare that the fish are presently feeding upon is key to success.
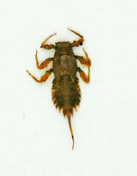
Land born foods are classified as terrestrials; consequently, water born foods are classified as aquatics. The significant terrestrials are ants, grasshoppers, mice, moths, lizards, earthworms, beetles, and crickets. The important aquatics are caddisflies, mayflies, stoneflies, midges, craneflies, dragonflies, damselflies, crustaceans, forage fish, leeches and eels.
These natural foods can be imitated by today's flies. But first the natural food must be identified. Knowledge of what the fish are presently feeding upon is essential to select the right fly. Time spent observing before fishing is well spent.
Start by watching the waters surface for insect activity. Observe both the birds and the fish to see what they are feeding upon. I carry a pair of compact binoculars and use them often. Then I collect a sample insect.
A small aquarium net can help collect the insects. Place the net just under the waters surface to catch the actively hatching insects. Also use the net to catch the air born ones.
Find a spider's web and observe its contents for a history of the available insects.
A stomach pump can remove the fish's recently ingested food. But first a fish must be caught. The pump is sold in most fly shops and is designed for its intended purpose. It is simply a rubber bulb with a plastic tube. The bulb injects a small amount of water into the fish's stomach and the pressure on the pump is released sucking some of the fish's ingested food back into the bulb. Now squeeze the bulbs contents back into your hand or into a white container. Inspect the contents. A major disadvantage is that the pump only removes the small food items and not the large ones lodged into the stomach. The pumps’ advantage is giving you the small presently ingested insects for identification.
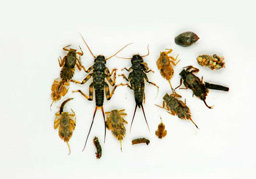
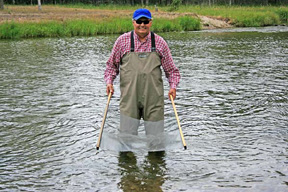
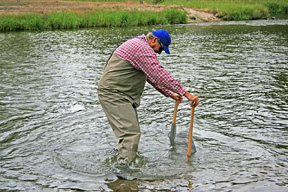
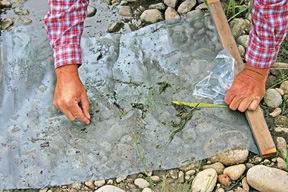
A large screen is useful in identifying the assortment of foodstuffs in a stream. Such knowledge is useful when purchasing or tying flies for the specific stream. The screen is made by stapling a three foot section of window screen to two broom handles or one inch by two inch slat boards. Place the screen downstream from your waded position. Next, dislodge or overturn rocks with your feet and allow the debris to collect onto the screen. Take the screen a shore and examine its contents. It will contain a large sample of the streams aquatic founds. Save its contents in small bottles filled with eighty percent alcohol and twenty percent water.
Once the foodstuff is collected, try to identify them. Next, go through your fly box and make a match. Choose a fly that mimics the foodstuffs size, texture, color and shape. Imitate the foods action with the proper presentation and retrieve.
The size concerns the foodstuffs measurements in terms of thickness, width, and length. Foods smaller than half an inch are best imitated as to its exact length; on the other hand, foods larger than half an inch are best imitated as to its exact thickness and width. Choose your fly selection accordingly. The texture is the overall feel as to the foods softness or rigidity. A fish's mouth readily detects texture and a too soft or too hard of a fly will be readily rejected. While a good match will be ingested.
The shape is the foods silhouette. This outline is an important consideration in matching the fly. Suggestive and impressionistic flies that match the foodstuffs three dimensional shape are the most successful. Suggestive flies can match a multitude of possible foods. While sometimes exact imitations restrict the number of matches.
The color match is helpful but it is not as important as the other elements of imitation. Natural foods color and patterns can vary in shades and tones. Hence select your fly as to the general color pattern of the natural.
Action, is the foodstuffs natural movement. The presentation and the retrieve mimics’ this motion. Action depicts a living movement that fish key upon while feeding.
Volumes of text could be written on the huge variety of foodstuffs eaten by fish. There are thousands of varieties of both land born and stream born insects. Try to classify your findings into one of the general groups. Match the natural foods size, texture, color, action, and silhouette with one of your flies.
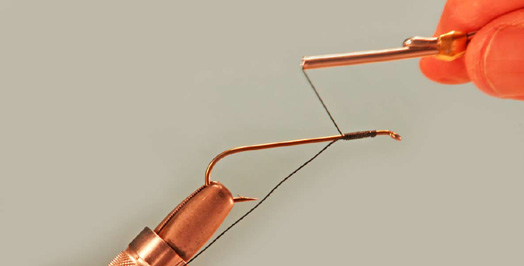
Thread Attachment
Wrap thread onto the hook shank from about 1mm behind the eye to the start of the hook bend. As you evenly wind thread try avoiding both spaces and over wrapping thread. You may trim off tag end after about 10 wraps.
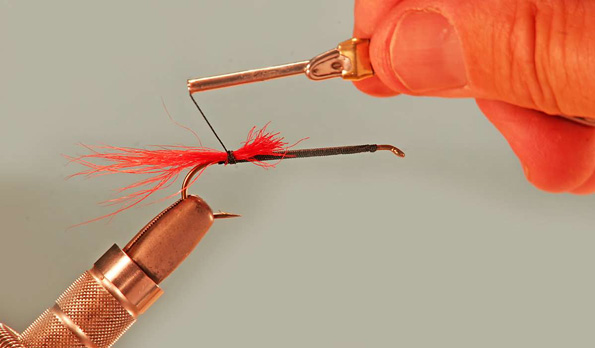
Tails: Hair (Deer, Calf, Moose, Elk) (Flared)
Wrap thread onto the hook shank from about 1mm behind the eye to the start of the hook bend. Tie in the hair tail material by making two loose wraps followed up with 3 to 5 tight wraps. Continue with additional tight wraps right to the base of the tail. These tight wraps will compress the hollow hair and flare those outwards.
Continue wrapping the hair forward to where the body is expected to end. This provides an even base for the body.
Wing: (Wet Fly Down Wing) (Yarn Hair)
Select yarn or hair and position it with tip ends rearward. If hair is used, clean away fuzz and short hairs.
Wrap with 2 loose windings followed up with 3 to 5 tight windings. After the loose wraps the wing can be repositioned or its length can be adjusted.
Pull excess base material upwards and clip closely parallel with hook shank. Wrap wing bases with thread.
Place a drop of thin head cement to penetrate and to additionally secure wing.
Note: Wing should be slanted 45° backwards. If needed, tie in thread behind wing to reposition it upright.

Hackles (Dry Fly Traditional)
Select hackle for proper size and desired stiffness. Cut stem at junction with webby and stiff fibers. Strip away fibers exposing 2 to 3mm of stem. Tie in stem with 2 loose wraps to place, followed up with 3 to 5 tight thread wraps. Concave side of hackle is opposite of body.
Wind hackle evenly forward to 1mm behind hook eye. Tie off with 3 to 5 tight thread wraps. Cut off to break away excess hackle. Short or slippery hackles require hackle pliers while long hackles can be wound with fingers.
Whip Finish
Whip finish head with 4 to 8 turns. Pull tag end firmly and cut off excess thread. Its easier than it looks. Place thread on the “S” hook as shown and wrap thread around the shepherds hook. Then wind the entire handle of the whip finisher in a clock wise rotation. Once the number of wraps are complete pull tag end of thread and ease up on the shepherds hook by gently pulling it towards the fly's head. Once there let the thread slip off shepherds hook.
Head Cement
Place a drop of head cement on knot and allow it to penetrate both the thread base and hackle stems.

Hackles
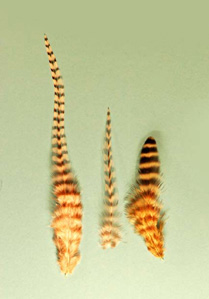
The far left hackles in both photos are saddle hackles. They are longer in length than the other 2 hackles. Saddle hackles can come in stiff or soft fibers. The stiff ones are best for dry flies because they soak up less moisture. These hackles come in larger sizes and are used to tie larger flies.
The center ones are neck hackles. Likewise they can come in either stiff or soft webby fibers. The soft ones soak moisture which helps sink the fly. Neck hackles come in smaller sizes and are useful in tying smaller flies.
On the far right are found the hen hackles. They are the softest and the webbiest of the 3 hackle types. They work well for wet flies and for burnt wing dry flies.
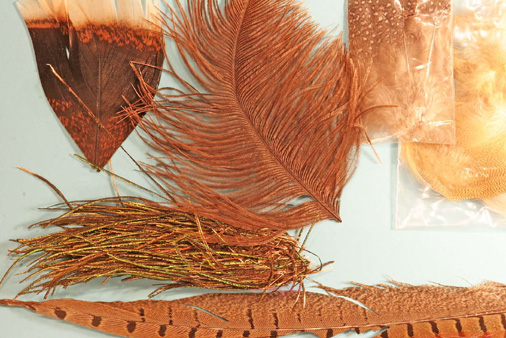
Feathers
Starting with the turkey tail in the upper left hand corner and travelling clockwise are the following: ostrich plume, guinea hen hackle, wood duck flank feathers, pheasant tail (bottom), and peacock herl. These feathers are used in tails, bodies, hackles, wing cases, and wings. Hence, these feathers are very useful in creating lifelike flies.
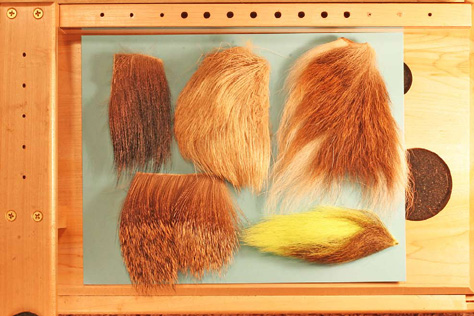
Hairs
The upper left is moose body hair and travelling clockwise are the following: elk, whitetail deer tail, died whitetail, and deer hair. All are used in forming tails, wings, legs, and in spinning bodies. (except for the whitetail tails because they spin and flare poorly) These hairs are hollow and provide some buoyancy to the flies.
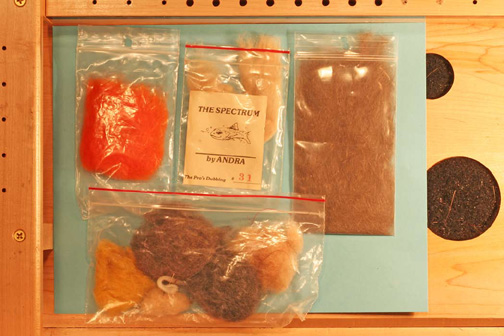
Dubbing
The above is an assortment of natural furs and synthetics. These are used to form dubbed bodies by the following method:
Wax thread with a light coat of wonder wax. Apply a thin amount of dubbing. Spread dubbing fibers out evenly on thread. Twist dubbing evenly on thread with thumb and forefinger.
Wrap dubbed thread evenly forward to the front end of the body. Tie off with 3 to 5 tight wraps.
Note: it is common to either over or underestimate the dubbing amount. It is easy to add more dubbing or pinch off excess dubbing.
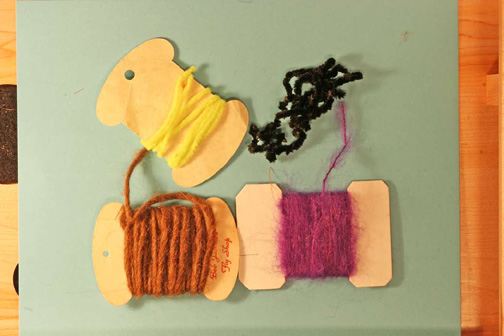
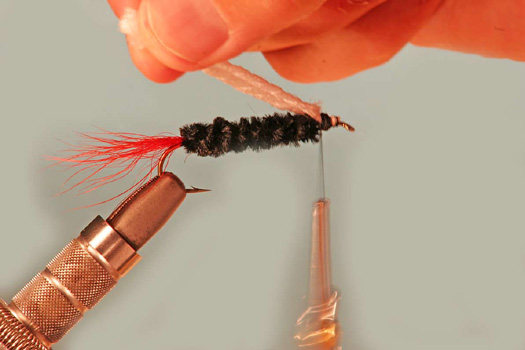
Yarns and Chenilles
The upper 2 are chenilles while the lower right one is a mohair yarn and the lower left one is a wool yarn. All are used to wrap bodies.
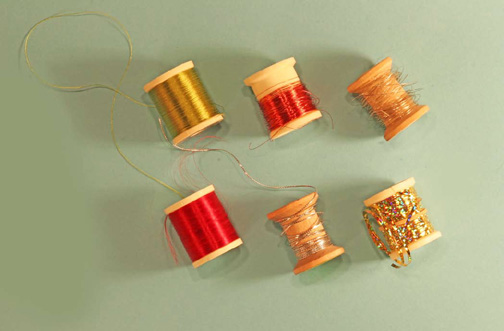
Threads, Tinsels, Wires, and Floss
Upper left is a waxed thread and clockwise to it are the following: fine red wire, fine silver wire, flat tinsel, oval tinsel, and red floss.
All are useful in securing wrappings, ribbing bodies and in providing coloration.
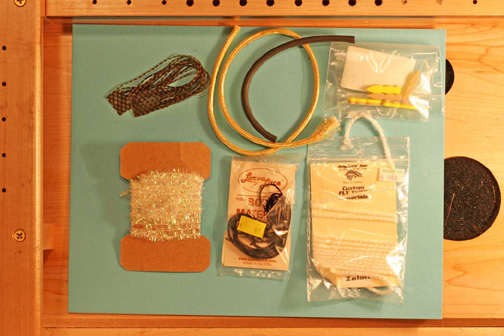
Additional materials
Upper left is a pack of elastic legs and clockwise to it are the following: mylar tubing, foam tubing, preformed foam bodies, zelon yarn, larva lace, and sparkle tinsel chenille.
These are useful materials for legs, bodies, and wings.
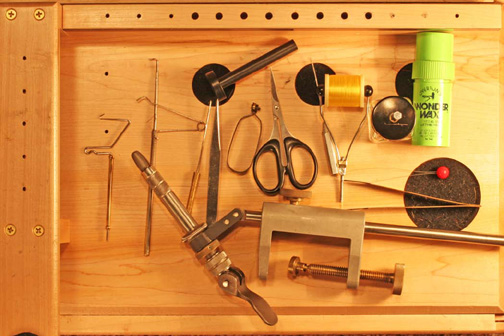
Fly Tying Tools
These are my essential tools. They are: bench organizer, vise, whip finishers, bobkin needles, tweezers, hair stacker, scissors, bobbin with thread, head cement and applicator, wonder wax, bobbin threader, and wing burner. Purchase quality tools and they will last for a lifetime. My vise is over 35 years old and has tied thousands of flies. It works as well now as when it was new.
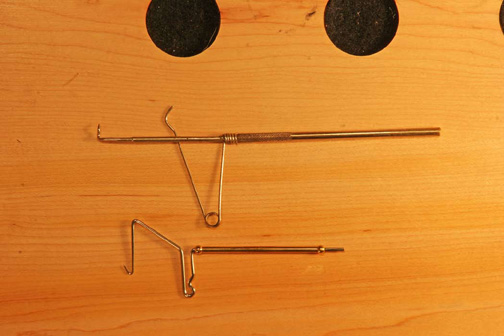
Whip Finishers
Pictured are the Thompson Whip Finisher above and the Matarelli Whip Finisher below. They are used to tie the whip finish knot which is the best knot to secure any wrapping. I prefer the Thompson to finish the head of the fly and I use the Matarelli to tie secure knots away from the head of the fly.

Threads and Bobbins
Pictured are bobbins loaded with pre waxed thread. The wax helps the thread stay in place and makes it easier to tie flies. Threads pictured are all different diameters. The fine 6/0 to 12/0 are used for the smallest flies. The 3/0 are used as an all-around thread for a wide variety if sizes. The A size is used on the largest flies.

© 2026 The Gale Group, Inc. All rights reserved.
© 2026 Perigee Learning LLC. All rights reserved.
LoveTheOutdoors.com is owned and operated by Advameg, Inc. © 2026 Advameg, Inc.
Camping Adventures • Dutch Oven Cooking • Sports Knots
Fly Tying • Freshwater Fishing • Fly Fishing