
One Person Tent Camping
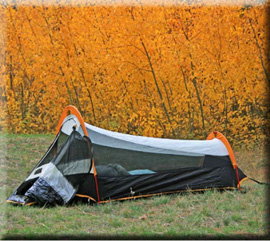
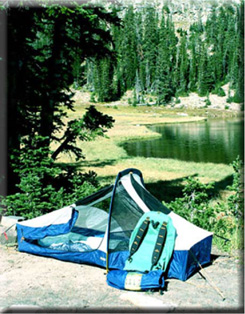
I want to demonstrate one of my favorite one person tent shelters. This tent is made by Walrus; in it I have slept warmly in a heavy snowstorm. It’s complete with mosquito netting and a waterproof, bathtub-like floor. It has a rain fly and it packs into a small stuff sack. It weighs slightly less than three pounds. Its components are lightweight stakes, shock corded aluminum poles, water proof rain fly, and the body of the tent has lots of mosquito netting. As I unpack it from its stuff pack I separate it into its four components; I only use the rain fly when it looks like it’s going to rain, which allows me to view the nighttime sky through the mosquito netting. I stretch out the bottom of the tent and select an area that is free of any rocks or sticks and is somewhat level, a comfortable place to take a nap on. I stake out the body of the tent, setting the stakes at a 45° angle to the tent. If the ground is soft then I can easily push in the stakes with my foot but if the ground is hard I may need to find one of nature’s plentiful hammers. A heavy rock can pound in the stakes. Plan where you want to have the front and back of the tent and position them into the desired locations. Next I assemble the shock corded poles. The shock cord makes this a simple process. I place the large arc pole toward the front of the tent and the small arc pole toward the rear of the tent. Next I thread these poles through their sleeves on the tent’s body. I set the poles’ ends inside the appropriate grommets. Note: You must push the poles through. If you try to pull, they’ll come apart at their ferrules. After both of these poles are set I stake down the center guy ropes with a stake at a 45° angle to the tent. I simply pull the center guys taut with the adjustment bracket that’s built into the guy rope. I adjust both center guys and this gives rise to the shape of my shelter. The rain fly is fastened by buckling the belt snaps together on each corner. The rain fly’s two center guy ropes are staked into place and adjusted by brackets. You want all guy ropes taut. This protects the tent from the elements and keeps it in place during a rain storm.
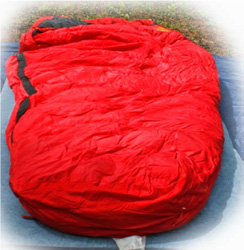
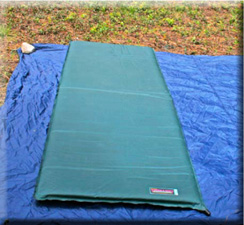
My bedding consists of a ¾” thick Thermo rest pad that is blown up to its fullest capacity. I use either my 0°or 20° sleeping bag depending upon the temperature. Place the brown side of the pad towards the earth and the blue side towards the sky to keep it from slipping. The brown material of the pad is designed to adhere to the tent’s floor while the pad’s blue material is designed to stay in place underneath the bag. This will help keep the pad in place throughout the night. The 20° sleeping bag is about a pound and a half lighter than the 0° bag. These are mummy sleeping bags and I’ve always felt like I’m cramped up in a cocoon if I zip them up in their traditional manner. But I’ve discovered a more comfortable way to sleep. I fully unzip the mummy bag, place my feet in its boot foot and place the down bag over the top of me. I just tuck in its sides and now it fits completely over my head and face if I so desire. I sleep surprisingly warm and far more comfortable because I can easily turn over and spread out my long arms. Sleeping this way is far more restful than being confined inside the bag.
In conclusion I believe that this one man tent adds about 10° to 15° in warmth to your sleeping system. It helps insulate the area around you much better than a larger traditional tent. Also, it provides superior protection from mosquitoes, ticks, and the like. It is also snake and reptile proof. It is also ultralight since this system can weigh as little as seven pounds, including backpack, tent, sleeping pad and sleeping bag.

Camping Adventures • Dutch Oven Cooking • Sports Knots
Fly Tying • Freshwater Fishing • Fly Fishing